Last updated 7/5/2026 17:45:11
Jump to Bottom
How to build:
| ||||||||||||||||||||||||||||||||||||||||||||||||||||||||||||||||||||||||||||||||||||||||||||||||||||||||||||||||||||||||||||||||||||||||||||||||||||||||||||||||||||||||||||||||||||||||||||||||||||||||||||||||||||||||||||||||
| Website | Author | Description |
| http://www.skychariot.com/ | Skychariot Home / Keith's Balloons | |
| http://www.skychariot.com/Homebuilt.html | Keith Sproul | How to make a Hot Air Balloon |
| http://www.skychariot.com/tetconst.html | Keith Sproul | How to make a Tetrahedron Hot Air Balloon |
| http://www.skychariot.com/vent.html | Keith Sproul | How to make Turning Vents |
| http://www.xlta.org/plans/index.html | Dan Nachbar & Paul Stumpf | XLTA Open Plans |
| http://www.apexballoons.com/balloons/ | Jon Radowski | Discussion on Balloon Design |
| http://www.apexballoons.com/tips/ | Jon Radowski | Tips on making a balloon |
| Balloon Design Spreadsheet | Steve Griffin | History of Smalley Spreadsheet |
Jump to Keith's Balloons
Jump to Pictures
Jump to Sewing Machines
Jump to Bottom
!!!! DISCLAIMER !!!!
Materials and ideas listed here are in part unproven and may be hazardous to use in the construction and operation of experimental hot air balloons. Building and flying experimental aircraft involves significant risk and may lead to serious injury or death. Always obtain professional advice when building or flying human-carrying aircraft!This web site will explain how to build a modern hot air balloon. It will show a few different ways on how to do things, but it will not show all options. The intent of this is website to help somebody just starting by putting everything you need to know in one place. The information needed to make a balloon has been out there on the Internet, but the problem has been that it hasn't been easy to find. When you did find it, you couldn't find everything in one place, and you had to guess at some pieces of information. This website will have all the information needed to make a modern hot air balloon envelope. This is an ongoing project, and I welcome input, comments, and additions. The website is copyright by Keith Sproul. The information is public and may be distributed as anyone sees fit. If you redistribute this information, please provide links back to this website.
I -HIGHLY- recommend reading the balloon design directions at http://www.xlta.org/plans/index.html
There is lots of useful information there. The main difference between that website and this on is that the XLTA website has the design for a 54k / 16 gore envelope only. This site uses the Smalley Spread sheet and has the calculations so you can create any size envelope with any number of gores. You can use this to make a radio controlled balloon with a volume of less than 3,000 cu ft up to any size you want.
If you have comments, additions or corrections, please send them to me at ksproul@skychariot.com
Making a balloon is not as difficult as it sounds. Making a home-built airplane, even from a kit can take 3,000 hours. With the modern quick-build kits, that can drop down to 1,000 to 1,500 hours or so, but you pay extra for the quick-build kit. Making an airplane from plans can take 5,000 hours.
Making a balloon can take anywhere from 150 to 300 hours. This is approximately 1/10 the amount of time it takes to make an airplane.
Sproul Construction Times
| Picture | Registration | Year Made | Size | Gores | Time | Comments |
|---|---|---|---|---|---|---|
 |
N-48KX | 2003 | 48,000 cu ft | 16 | 7 Weeks 175 hours |
First Balloon Turning Vents |
 |
N-73KX | 2004 | 73,000 cu ft | 24 | 5 months 250 hours |
Pattern took more time Turning Vents |
 |
N-72KX | 2004 | ~90,000 cu ft | 3 sides 48 panels |
5 Months 150 hours |
Tetrahedron |
 |
N-9713T | 2006 | ~60,000 cu ft | 3 sides 42 panels |
4 months 130 hours |
Tetrahedron |
 |
N-72KX | 2010 | ~90,000 cu ft | 3 sides 48 panels |
16 months 210 hours |
Tetrahedron Inlaid Stars were troublesome |
 |
N-48KX | 2018 | 48,000 cu ft | 16 | 4 years 165 hours |
Rebuild of original LimeLight Turning Vents |
 |
N-83KX | 2019 | 83,000 cu ft | 16 | 4 months + 213 hours |
Larger version of Indecision Turning Vents |
| N-83KX | 2024 | 83,000 cu ft | 16 | Rebuild of Undecided | Turning Vents | |
| N-105KX | 2024 | 105,000+ cu ft | 24 | -- | Red/Blue Arror Balloon Turning Vents |
|
 |
N-49KX | Future | 48,000 cu ft | 16 | -- | To fly with second T&C SkyChariot Turning Vents |
Before you start, answer the following questions:
|
Design Discussion
The information presented here will primarily discuss how to make horizontal-cut hot air balloon. This design we will use is what is known as the SMALLEY SPREAD SHEET. This is a spread sheet that will give you the dimensions you need to make a balloon. The Smalley spread sheet can be used for both vertical cut gores and horizontal cut gores. (You can also use the gore dimensions from the Areostar manual for the S49A, S50A, S51A, S52A, S53A, S55A, S57A, S60A, S71A, S77A and S81A envelope patterns.) Making a horizontal cut gore balloon requires more cutting and more sewing. But, the cutting is MUCH easier, takes less space, and produces a stronger balloon. If you make a balloon with vertical cut gores, you need a hallway 10 feet wide and as long as your gores (80 - 100 feet). Since must of us don't have access to that, it is impractical to make balloons that way. In addition, by making a horizontal cut balloon, you get seams every five feet. These seams act as rip stops, and also as horizontal load tapes. With a vertical cut balloon, you have to add horizontal load tapes. With a horizontal cut balloon, you either don't need any horizontal load tapes at all, or maybe only one or two. In a horizontal cut balloon, All panels will be cut with straight edges, simplifying cutting and sewing.| # of People | Size Cu Ft | Diameter Ft | Height Ft | Aprox Weight |
|---|---|---|---|---|
| 1 | 31,000 | 40 | 40 | < 100 lbs |
| 1-2 | 50,000 | 50 | 50 | |
| 2-3 | 77,000 | 55 | ||
| 3-4 | 90,000 | 57 | ||
| 4-5 | 105,000 | 60 | 200 lbs |
| Pros & Cons of Experimental vs Commercial | |
|---|---|
| Pros | Cons |
| Less Expensive than buying new | Can't fly Commercial |
| You can do your own inspections and repairs | |
Sewing Machine Discussion
Having a good sewing machine can make all the difference in making a balloon. There are several good choices which can often be found on Ebay. My favorite is a sewing machine with a Puller. The Singer 112W116 has a puller, but this is an older machine. Even though it is an older model, it it is still a great choice. 212W120's can be found with pullers, but there isn't a specific model number for them that I have found. My favorite machines are the 212W120 with puller and a Consew 333RB with puller. The Consew 333RB has the advantage that has a much bigger bobbin, so you don't have to change bobbins as often.You should be able to find a sewing machine between $300 and $900, maybe a little more with puller.
There are some options that you can do with the sewing machine after you get it.
|
Tools that you need | ||
|---|---|---|
| Cutting Table | 6' x 10' or longer ideal | Pool table or Ping-Pong table will do Put MDF (Medium Density Fiber board) on top for cutting surface. Also nice to have rotary cutting mats, but they are expensive |
| Rotory Cutter or good scissors |
Available at your local sewing store. | |
| Double Needle Sewing Machine | Consew 333RB Singer 212w140 Singer 112w116 Singer 112w140 Brother Juki Pfaff |
3/8" needle spacing is preferred. You can change the spacing of a machine for less than $100 EBay is a good place to look A puller is very nice, but not required. Pullers are also hard to find Do NOT get a walking foot sewing machine |
| Seam Folder | Tennessee Attachments I highly recommend a seam folder. You need to get one designed specifically for your fabric and seam size. | |
| Metal Rulers | 4 ft 6 ft 12 ft (or length of table) | Ace Hardware, Home Depot, Lowe's |
| Spring Clamps | Ace Hardware, Home Depot, Lowe's | |
| Marking Pencils | Sharpies White Fabric Pencils | Various colors of Sharpe's Especially Silver for dark fabrics |
| Masking Tape | 2" wide Normal Masking Tape | Ace Hardware, Home Depot, Lowe's Buy the Contractors pack (10 rolls in a package). Don't get the Blue stuff, also don't get the tape marked as "LOW TACK". |
Materials that you need | ||
| Material | Quantity | Source / Comments |
| Nylon | 500 - 1000 yards |
MagnaFabrics.com www.westmarkcorp.com |
| Load Tape | 500 - 1000 yards |
www.ballyribbon.com kwwebbing.com www.pamnarrowfabrics.com tnwebbing.com |
| Nomex | 20 - 40 yards | Tex Sales, Montreal, Canada (Was Difco Performance Products) www.davisinteriors.com |
| Crown Ring | 1 (4" - 11" Metal Ring) | From an old balloon |
| V-Rings | 1 per gore | From an old balloon or Forgecraft (Part # 54A90B2) www.dj-associates.com |
| Quick-Links / Rapide Links | 1 per gore | www.dj-associates.com |
| Hook & Loop Fastners (Velcro) | 2" wide for Parachute 6" - 8" per gore | Get the sew-on kind, NOT the stick-on kind |
| Pulley(s) | 1 or 2 for Parachute 1 for each turning vent | From an old balloon |
| Caribiners or A-Blocks | 4 | From an old Balloon http://www.stumpfballoons.com/carabine.htm Many other sources |
| 1/8" or 3/32" Aircraft Cable 7/19 Galvanized | 10-15' per gore | Aircraft Spruce and many other sources |
| Cable Thimbles | 1 per gore | Aircraft Spruce and many other sources |
| Nicopress Fittings | 1 1/2 per gore | Aircraft Spruce and many other sources |
| Red Line Vent Lines | From an old balloon or -GOOD- polyester braided rope NON-stretchy | |
| Thread | Polyester Bonded Size 69 or Size 92 Left Twist 3 1 lb cones/spools |
Do not use Nylon. Polyester is much better. Make sure it is bonded. You will need three cones of thread, one for each needle and one for the bobbins. I prefer getting the pre-wound bobbins, but that costs a little more www.thethreadexchange.com |
Steps to make a Horizontal Cut Smalley Design Hot Air Balloon Envelope
|
Discussion of Steps
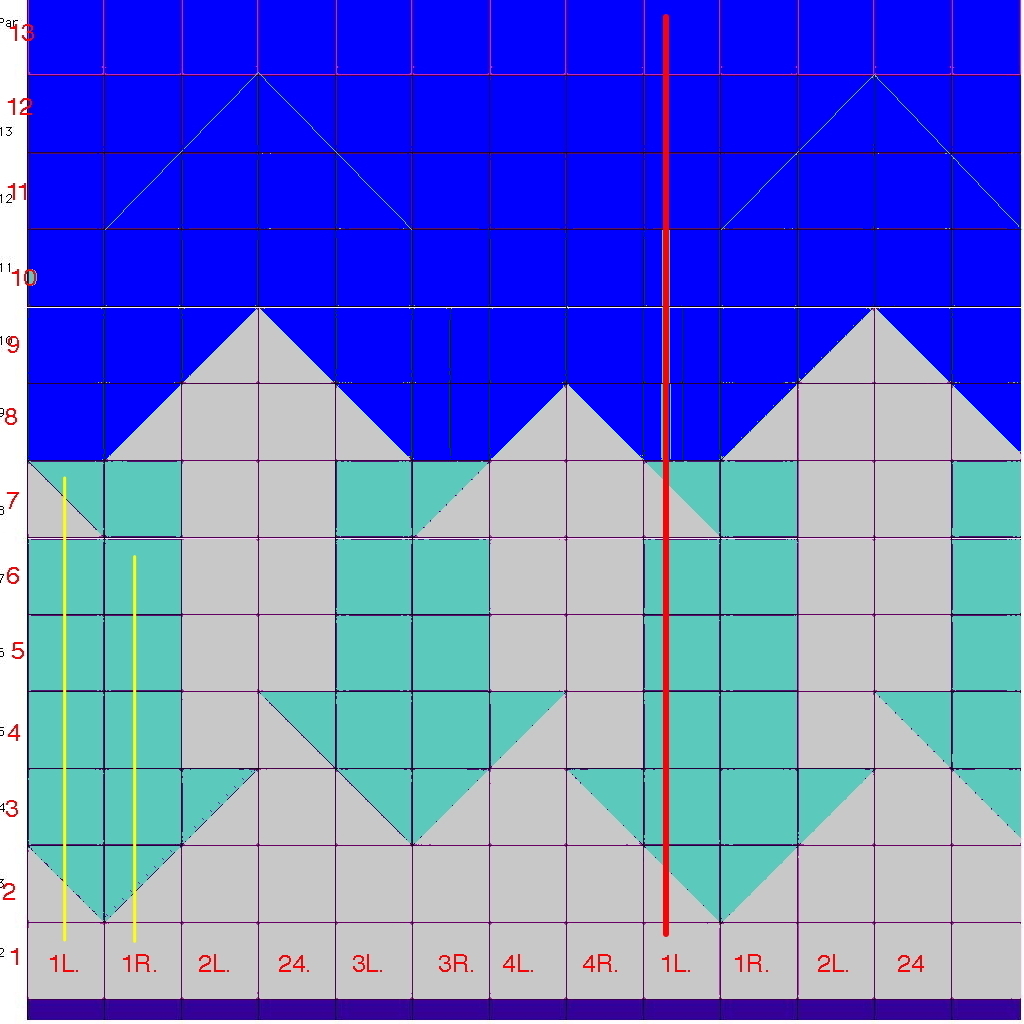
Balloon Size depends on a lot of things. How many people do you want to fly? How big you are? What type of temperatures do you fly in? If the balloon is too small, you will easily overheat it. If it is too big, it can be hard to bring down. Yes, this sounds hard to belive, but it is true. Also, if the balloon is too big, you will be under-pressurized. This will allow the balloon to cave in on the sides if you go thru bad wind-shears. I like to fly balloons cool, so I usually make them a little bigger than needed, but you don't want them too big. You also need to decide on the number of gores. For smaller balloons, 16 gores is usually enough. If you are making a balloon larger than 77k, you should consider 24 gores. The more gores, the smoother / rounder the balloon. Less gores make the balloon more bulbous. |
Keith Sproul's Home Built Balloons
Jump to TopJump to Bottom
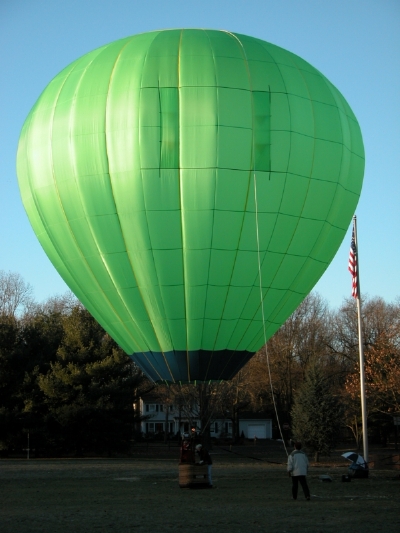
N-48KX
LimeLight
Sproul 48K-16 (2003)

N-48KX
N-48KX
LimeLight
Sproul 48K-16 (Re-built 2017-2018)
N-48KX
N-73KX
Indecision
Sproul 73K-24 (2004)

N-73KX
N-73KX
Indecision
Sproul 73K-24 (Rebuilt 2019)
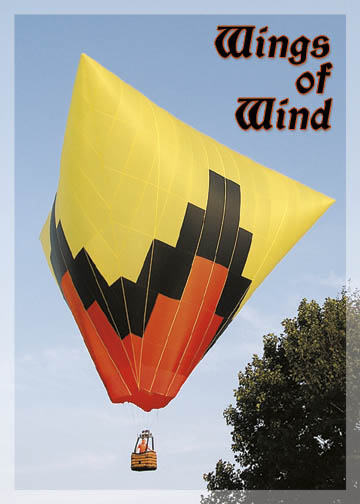
N-72KX
Wings of Wind
Sproul 72K-TET (2004)

Tetrahedron Balloons
N-9713T
Blaser Tet
Sproul 46K-TET (2006)
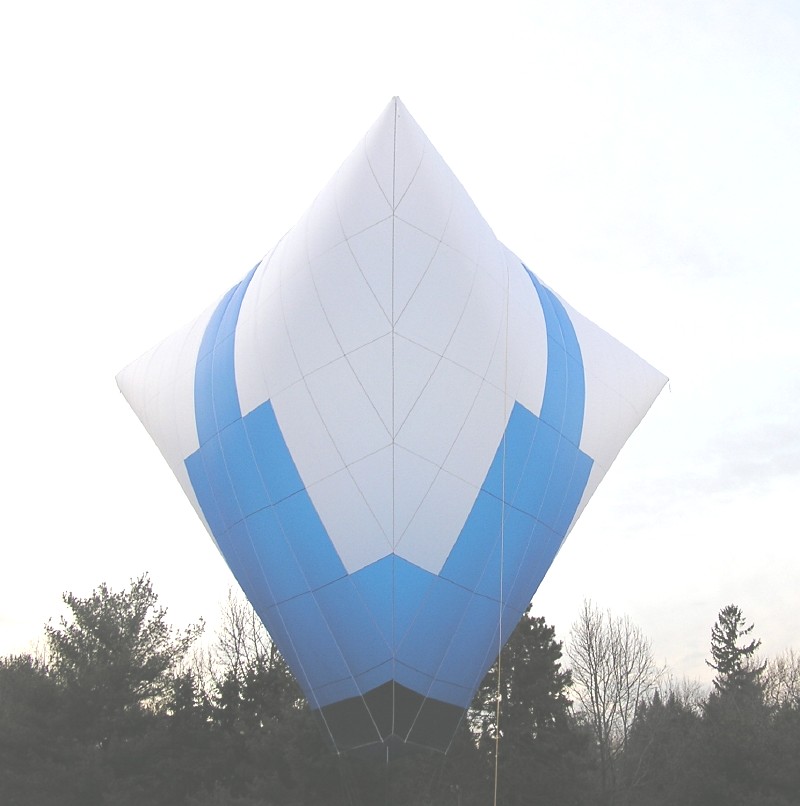
Tetrahedron Balloons
N-72KX
StarTet
Sproul 72K-TET (2010)

Tetrahedron Balloons
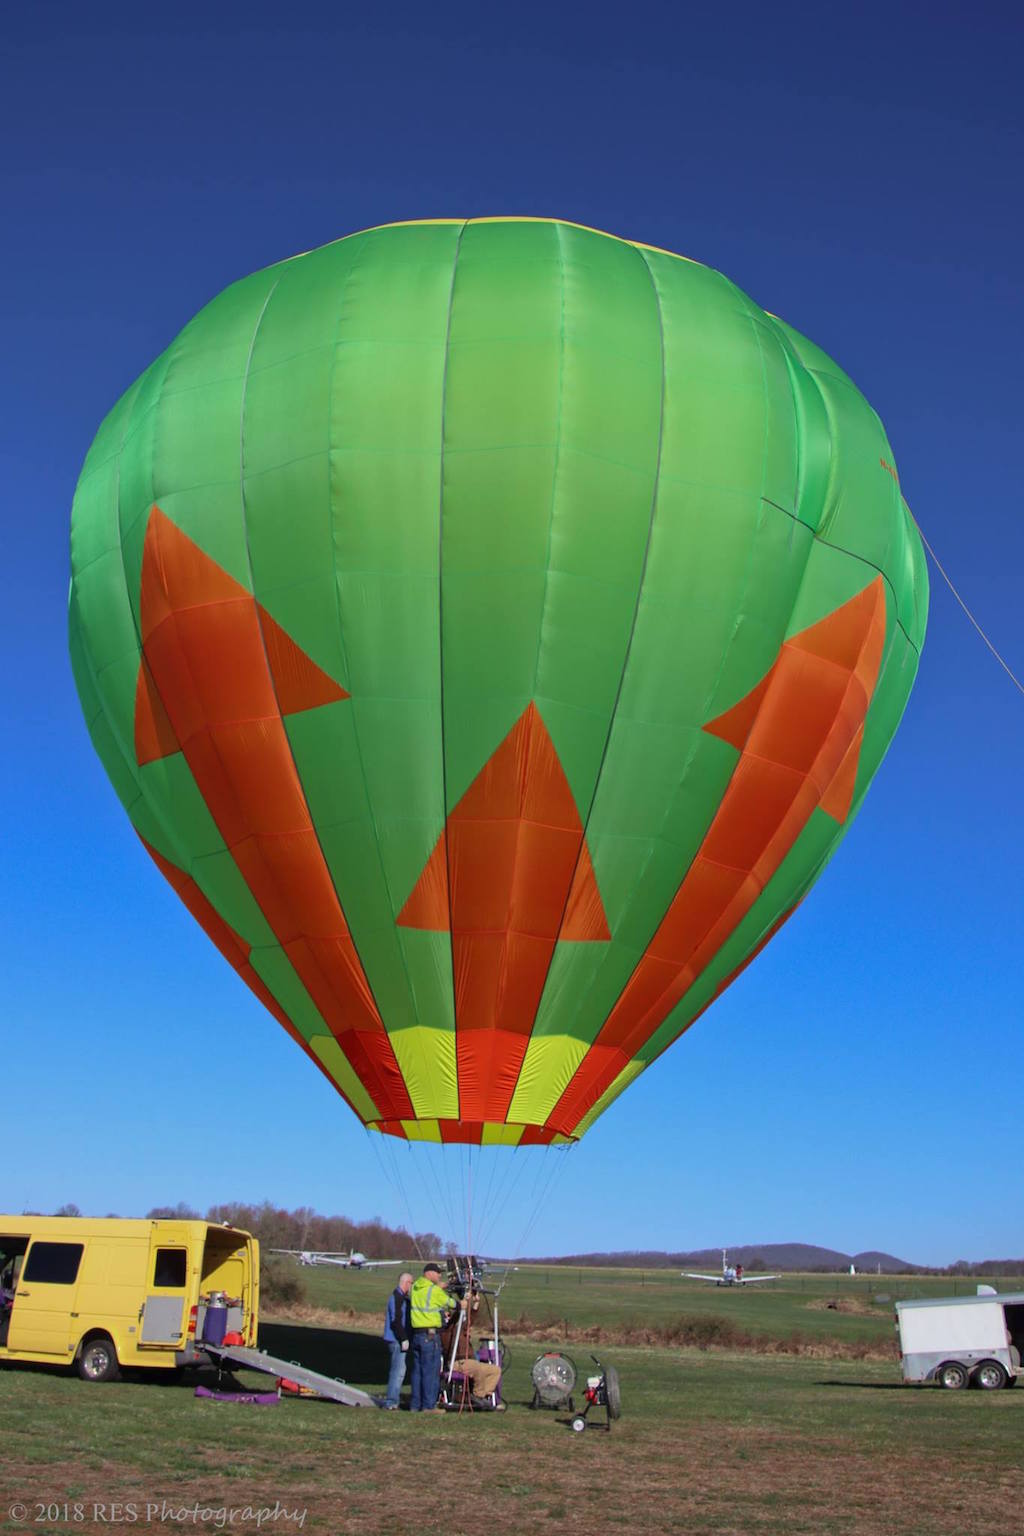
N-83KX
Undecided
Sproul 83K-16 (2019)
N-83KX
Pictures mentioned in descriptions
Jump to TopJump to Bottom
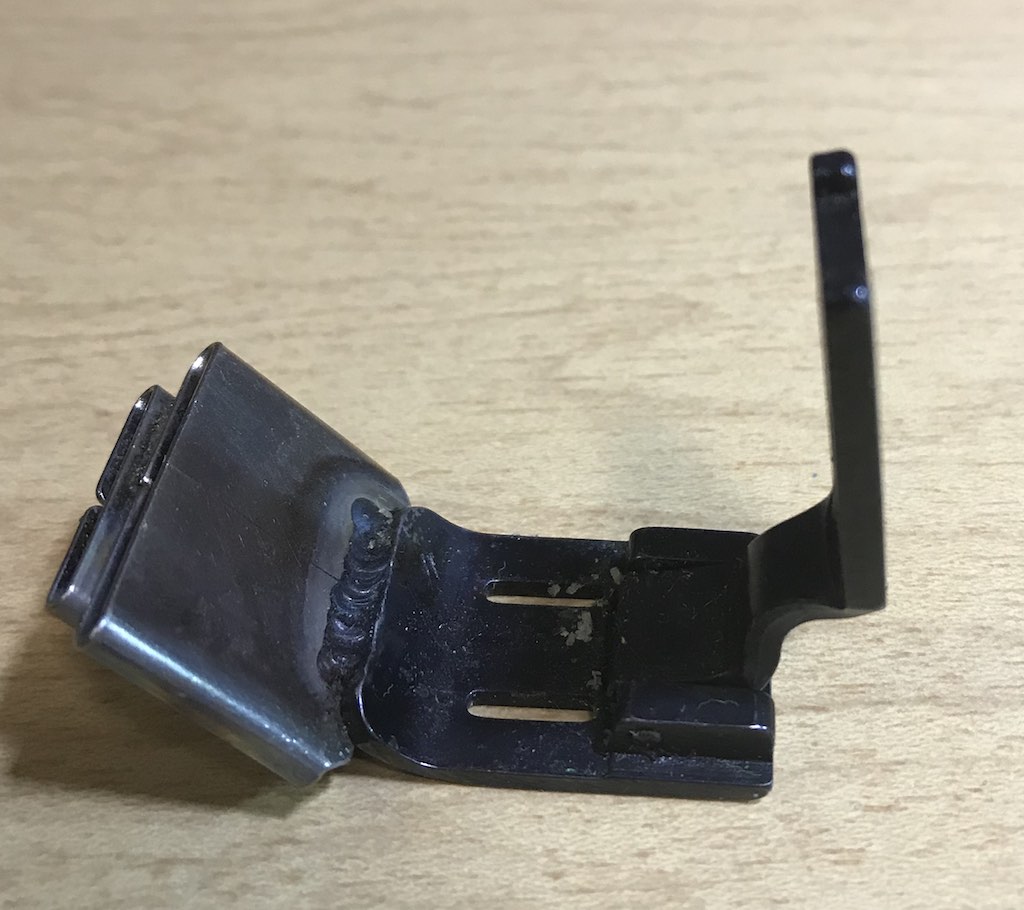
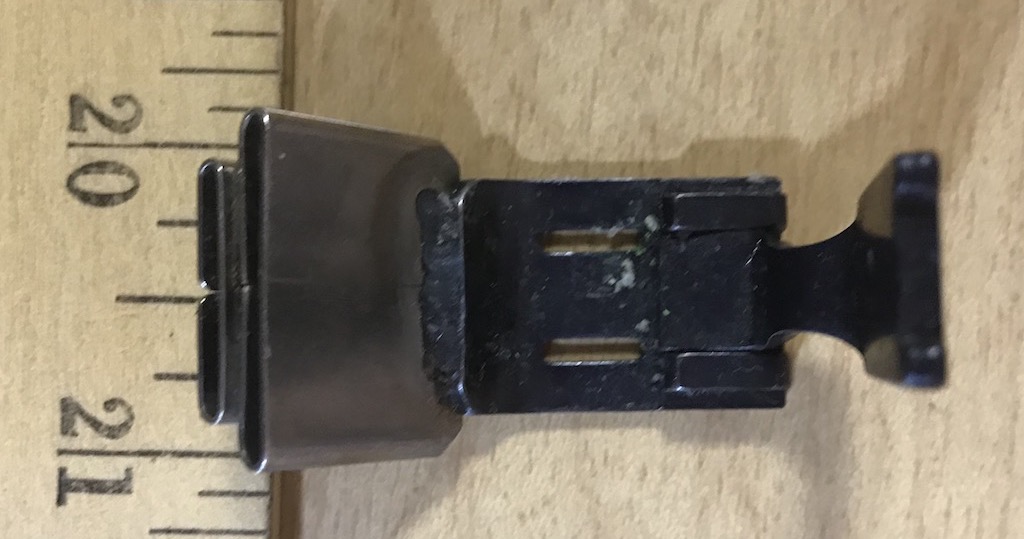
Tape Foot
For feedling load tape into seam
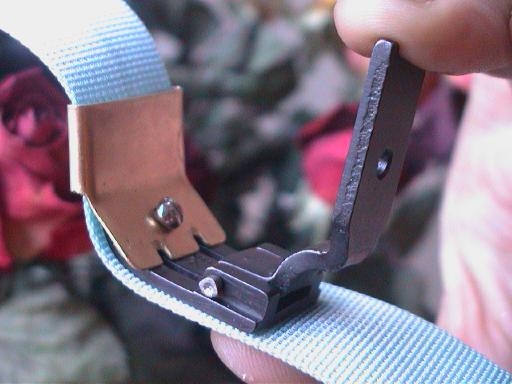
Tape Foot
Note, has 1" and 3/4" slots
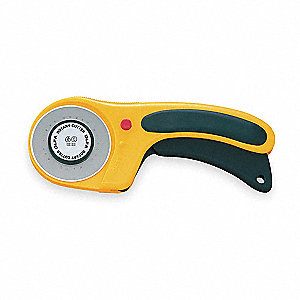
Hand Held Rotary Cutter
Requires Cutting Matt
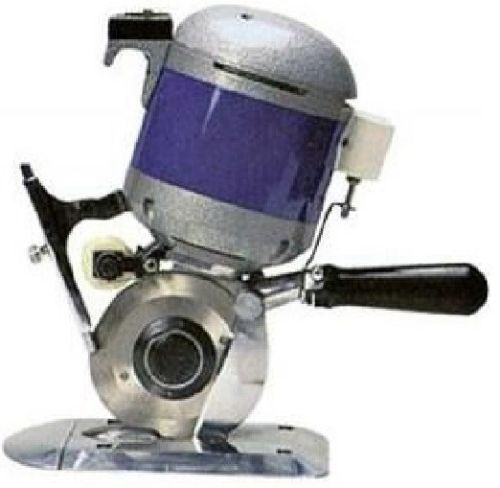
Electric Rotary Cutter
$400 - $500
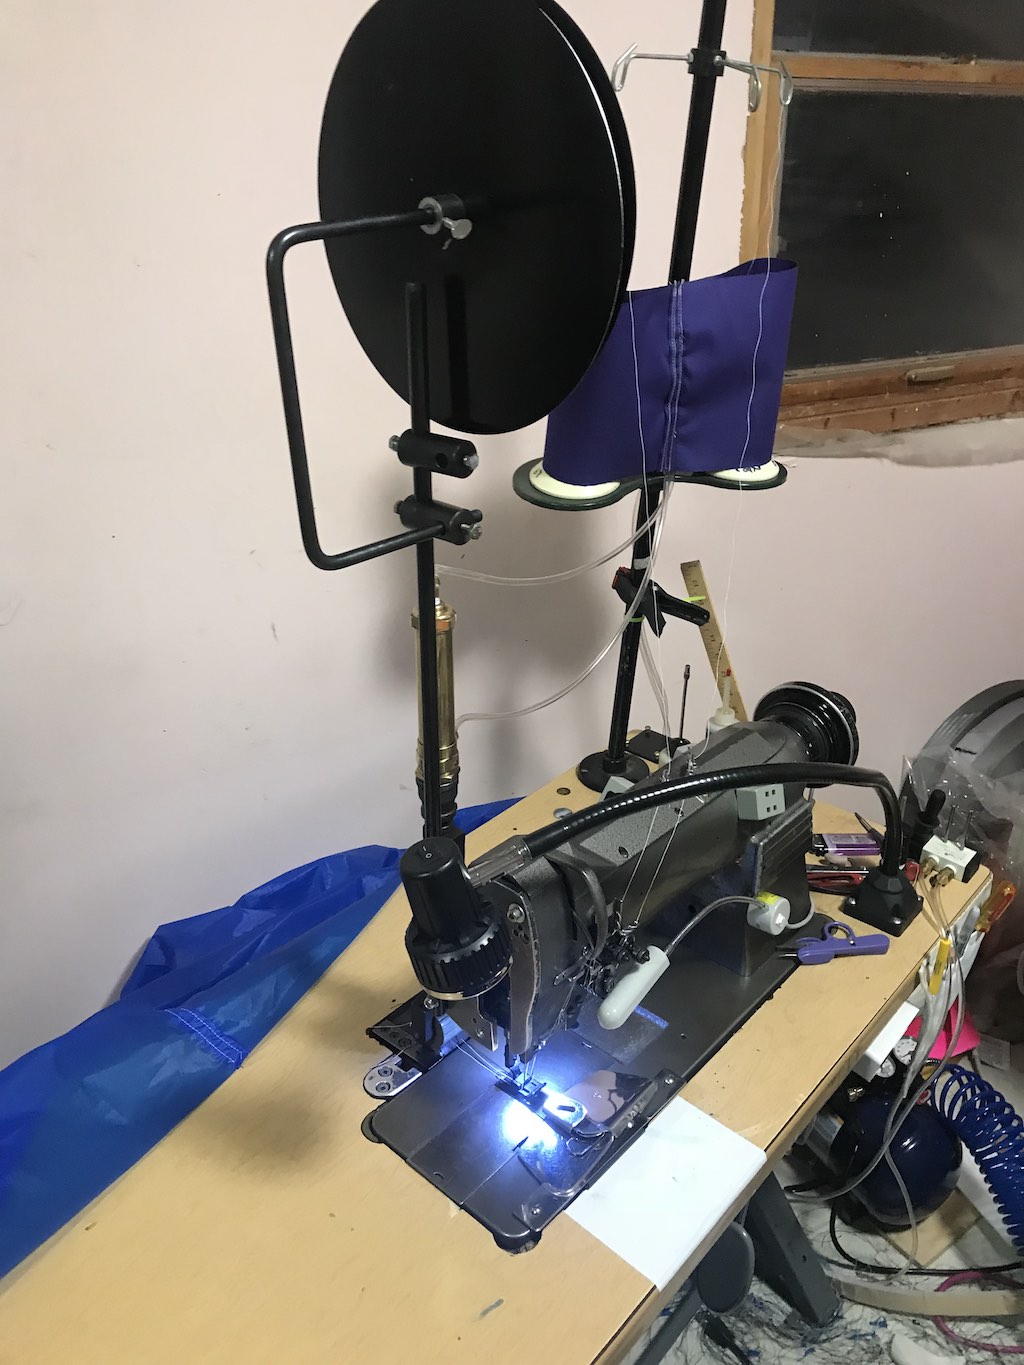
Keith Sproul's Sewing Machines
Jump to TopJump to Bottom
Main Production Sewing Machine
Consew 333RB with Puller
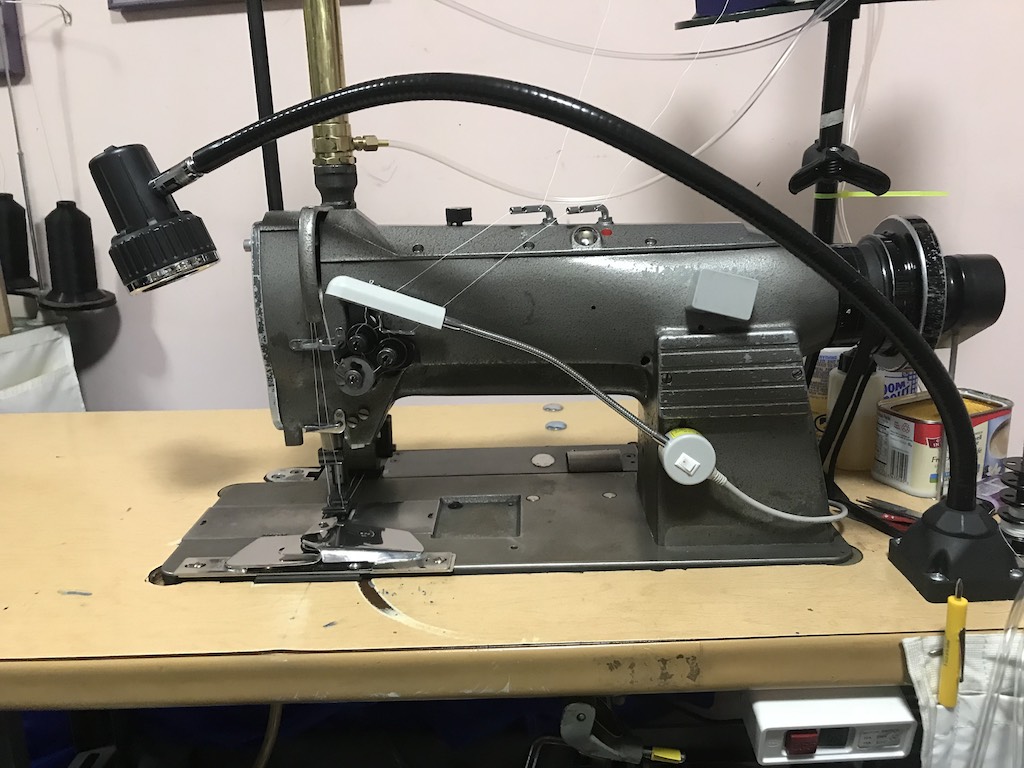
Note: French Feld Seam folder in front of sewing foot
Note: Puller is raised and lowered with compressed air
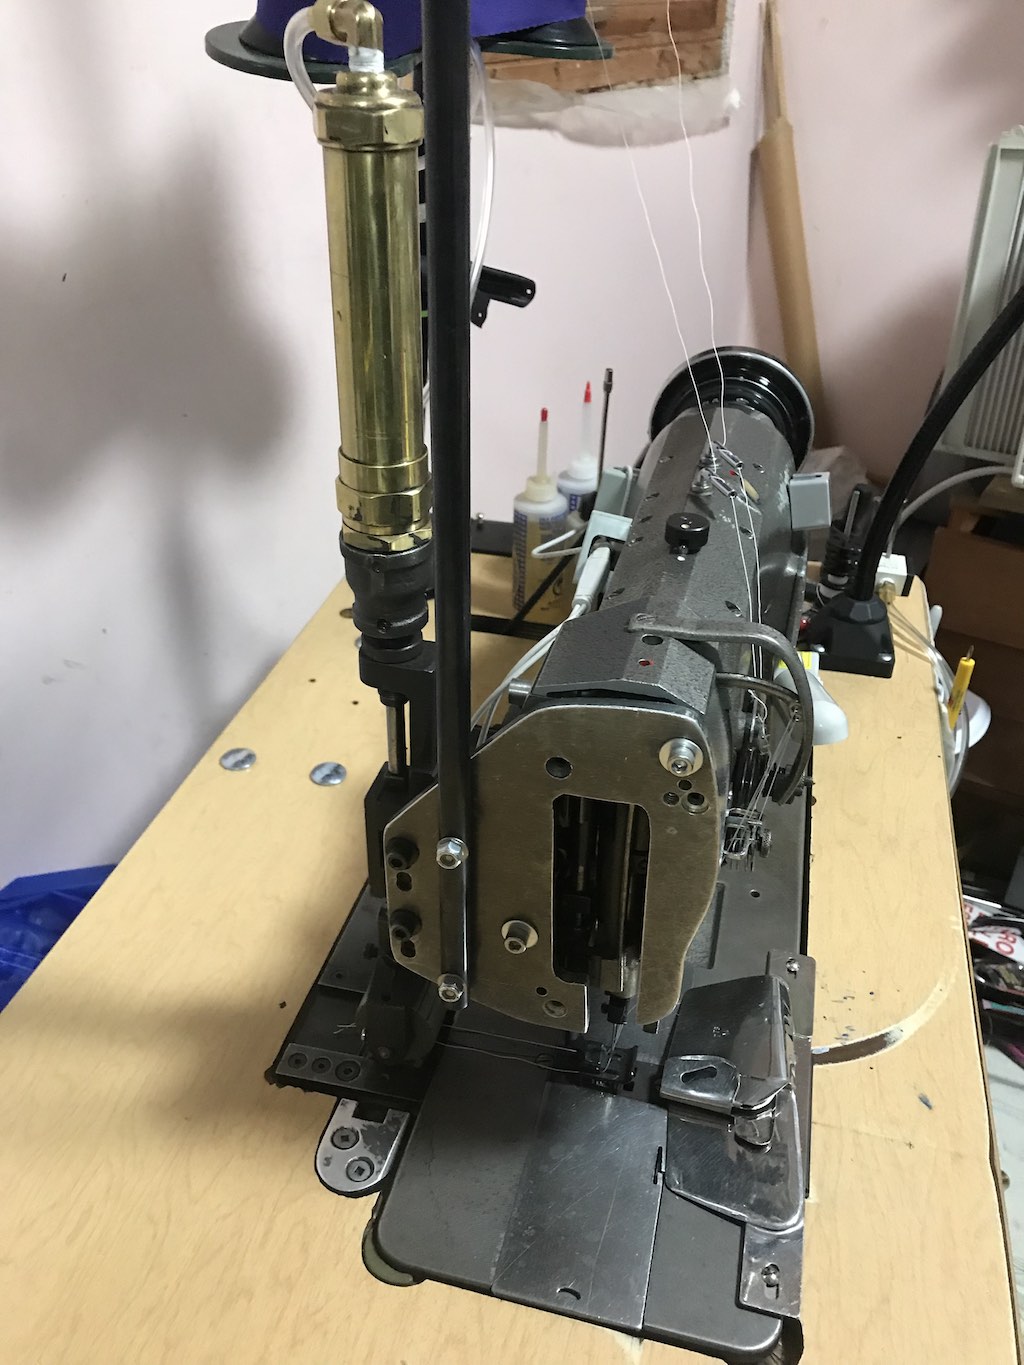
Close up of Puller
Embeded light shows fabric going into folder
Load Tape Rack
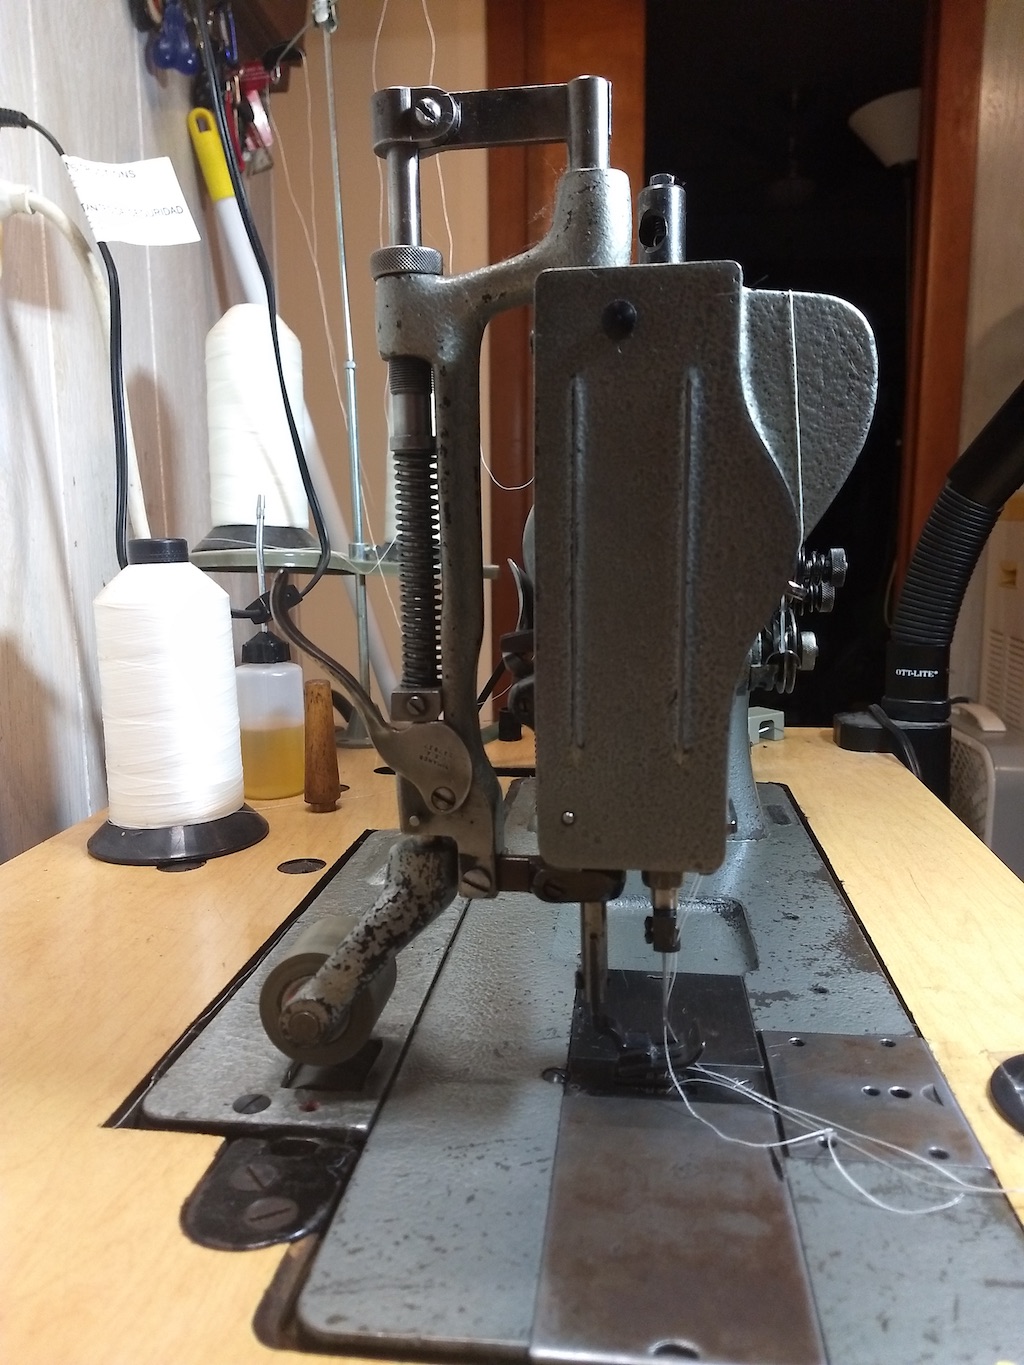
Second Production Sewing Machine
Singer 212W120 with Puller
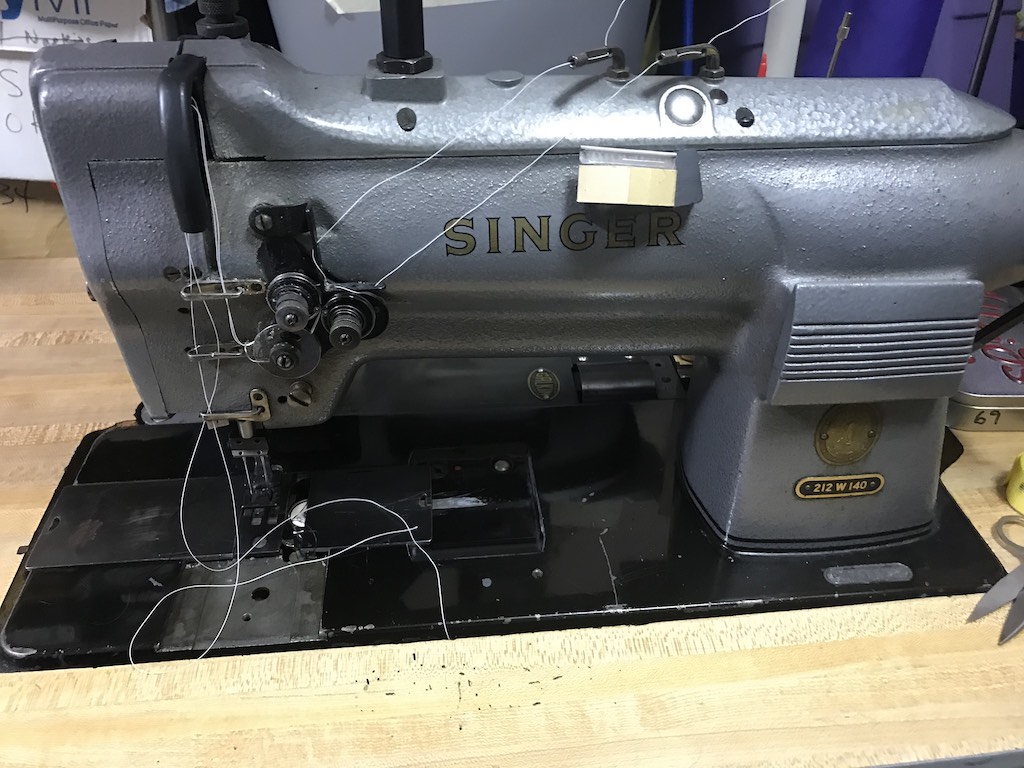
Note: Puller is raised and lowered with manual lever
Close up of Puller
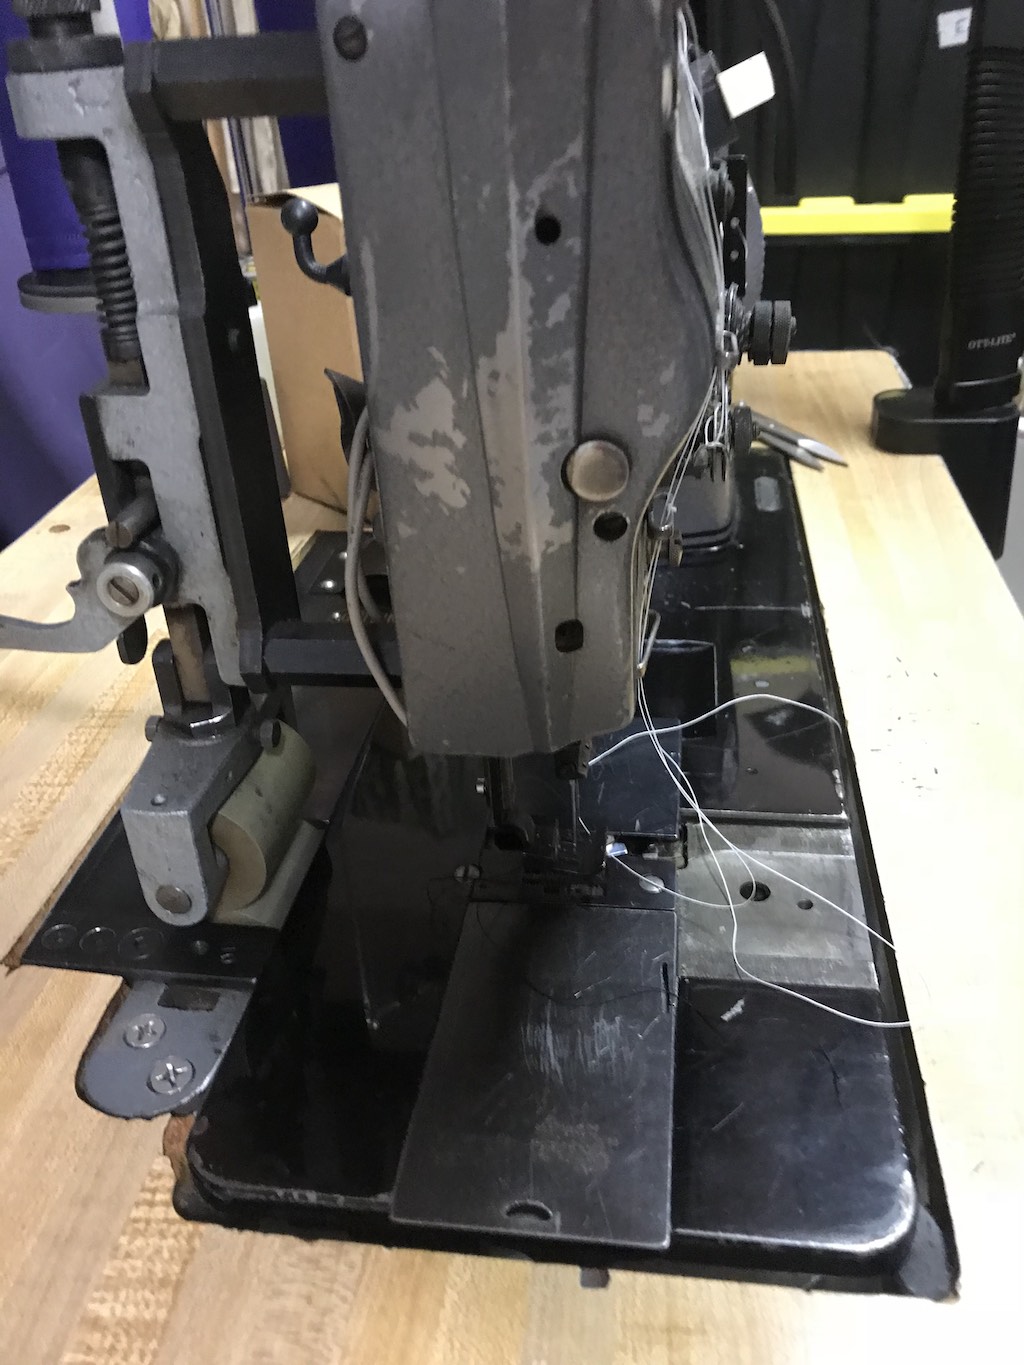
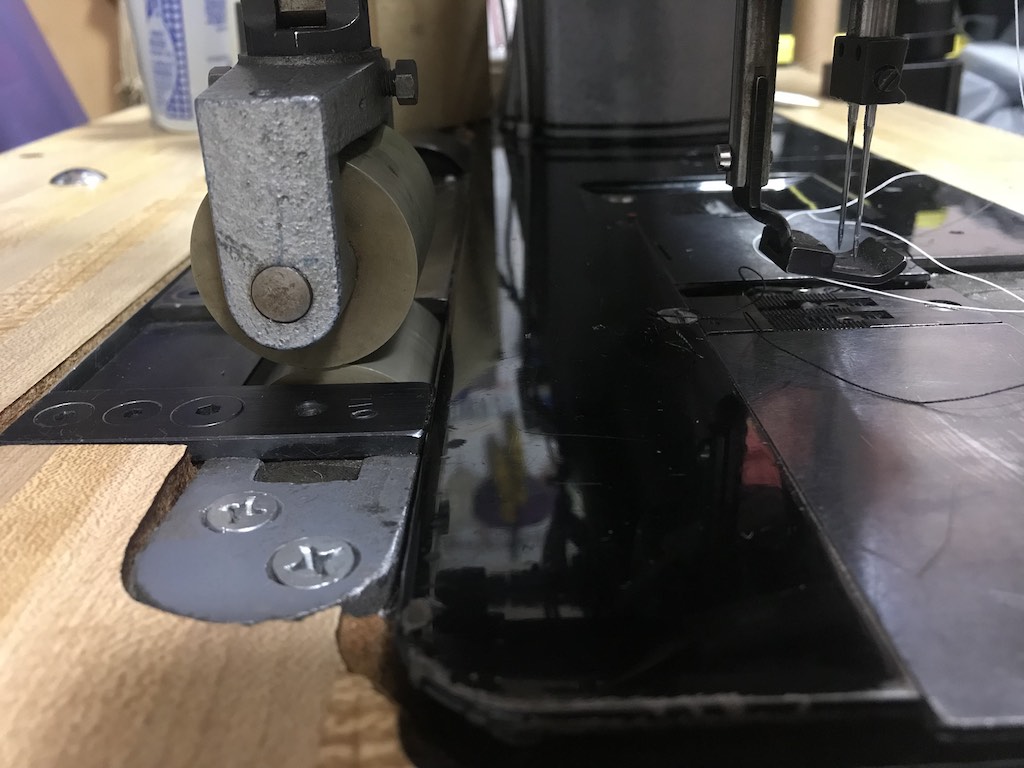
Backup Production Sewing Machine
Singer 112W116 with Puller
Note: Recessed light in front of Sewing Foot
This makes it so you can see the folded seam
Close up of Puller
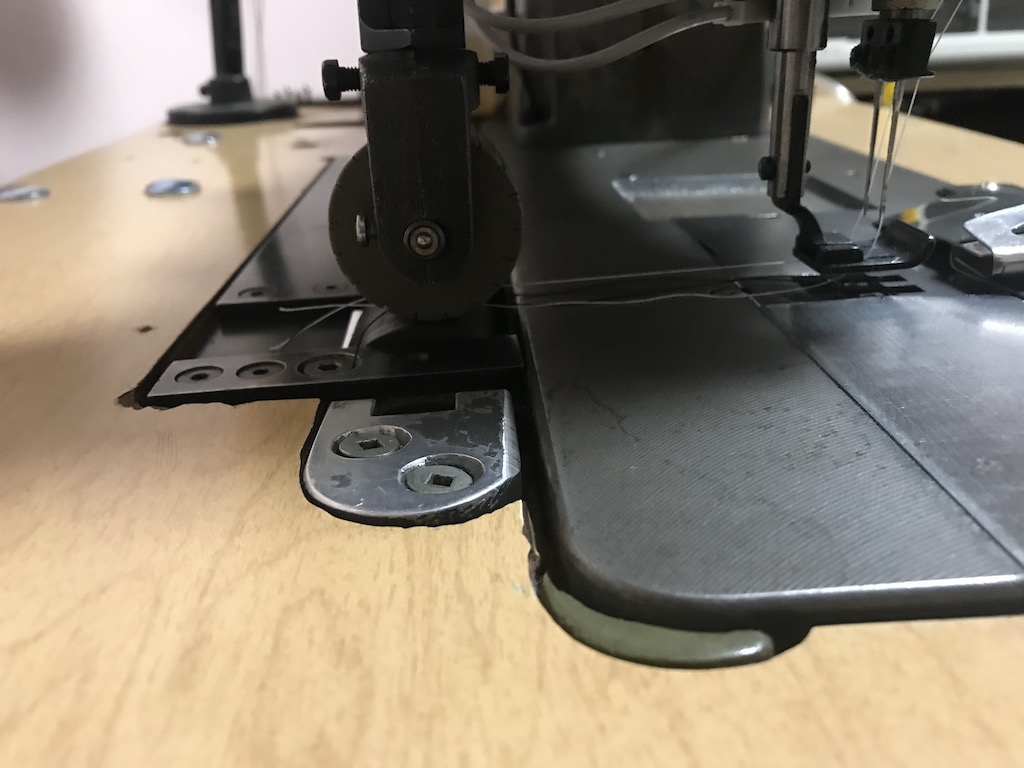
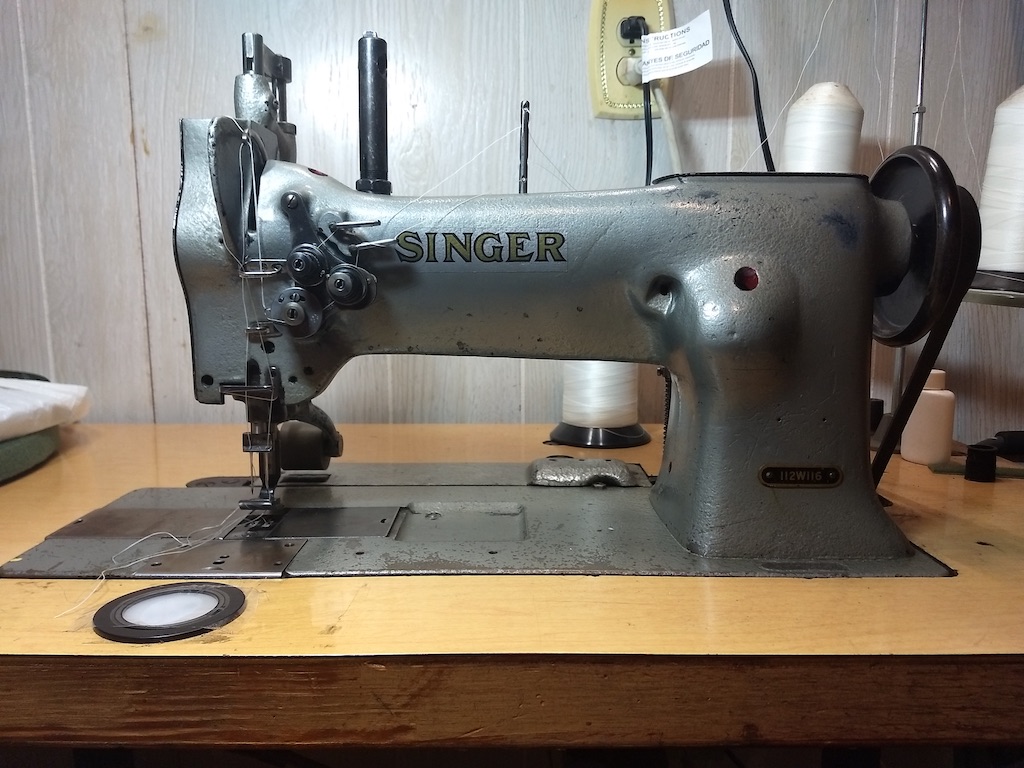
Main Repair Sewing Machine
Singer 212W120
No Puller, Puller gets in the way when doing repairs
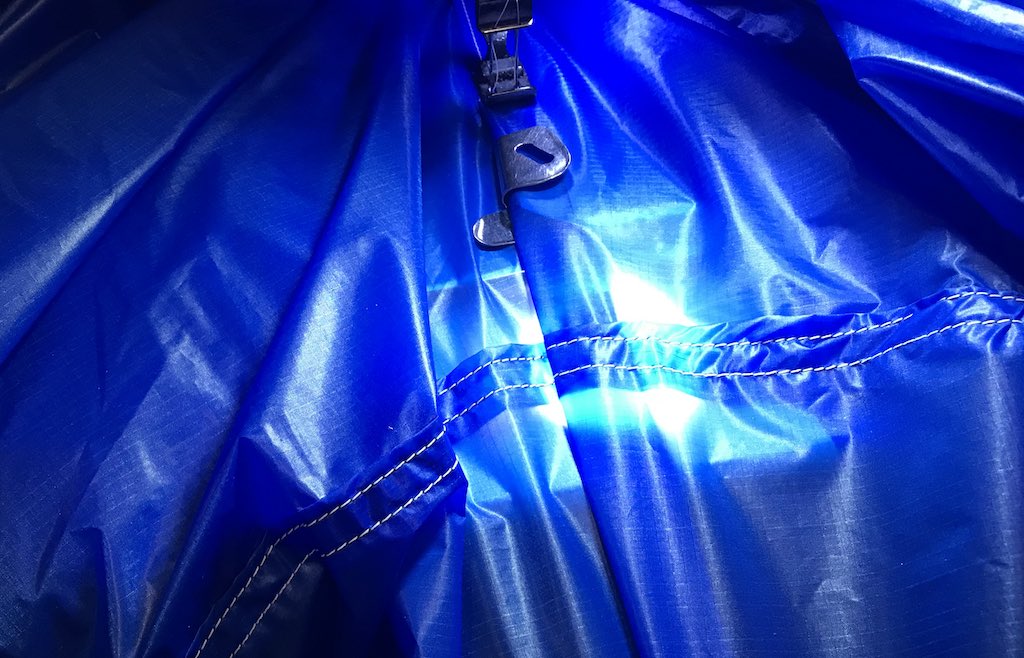
Installation of Recessed Light

2" hole drilled with hole saw 3/4" down
Make sure the hole is deep enough so that the LED light does not touch the tape.
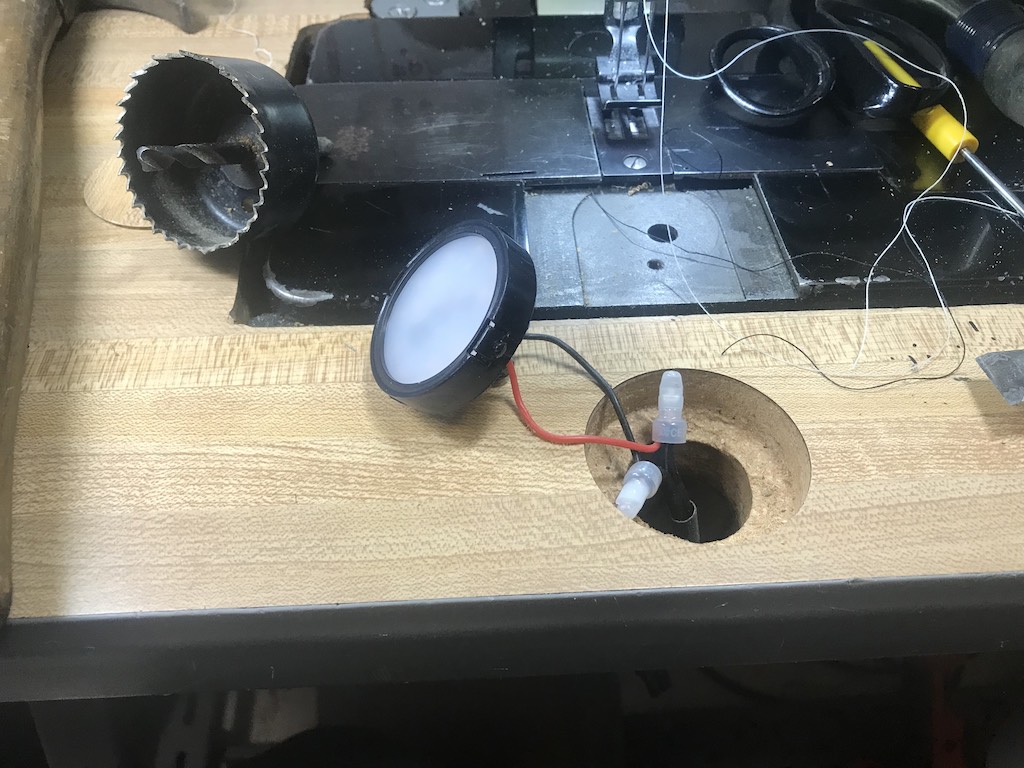
1" hole all the way thru for wires
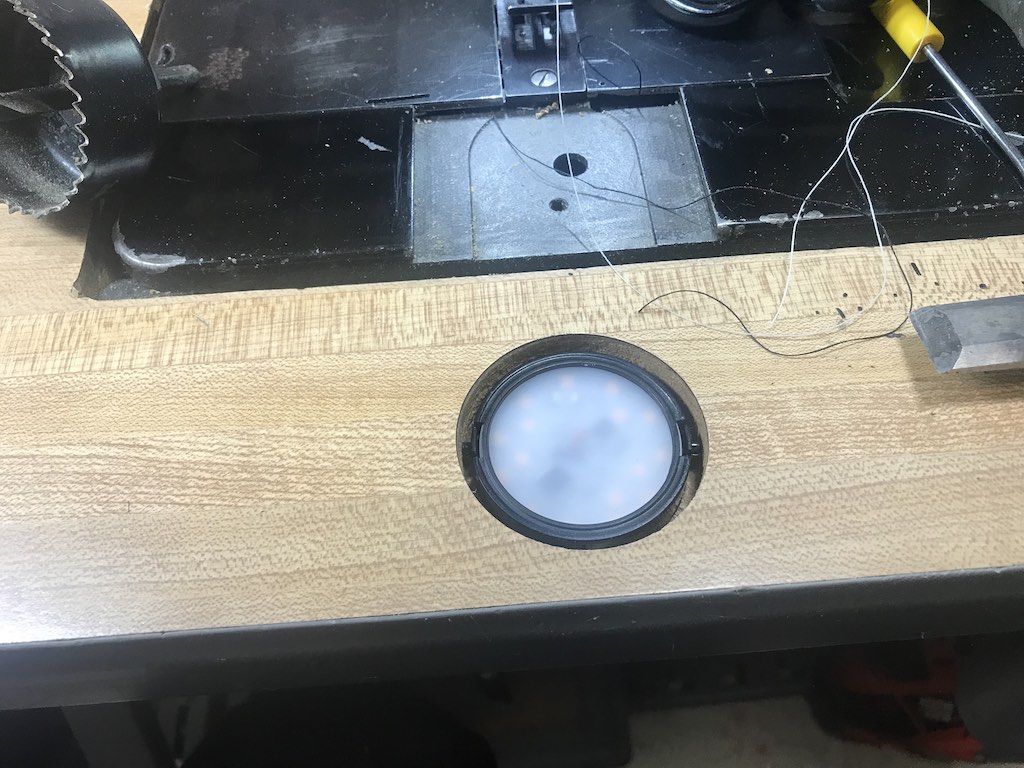
Puck LED Light from Home Depot or Lowes
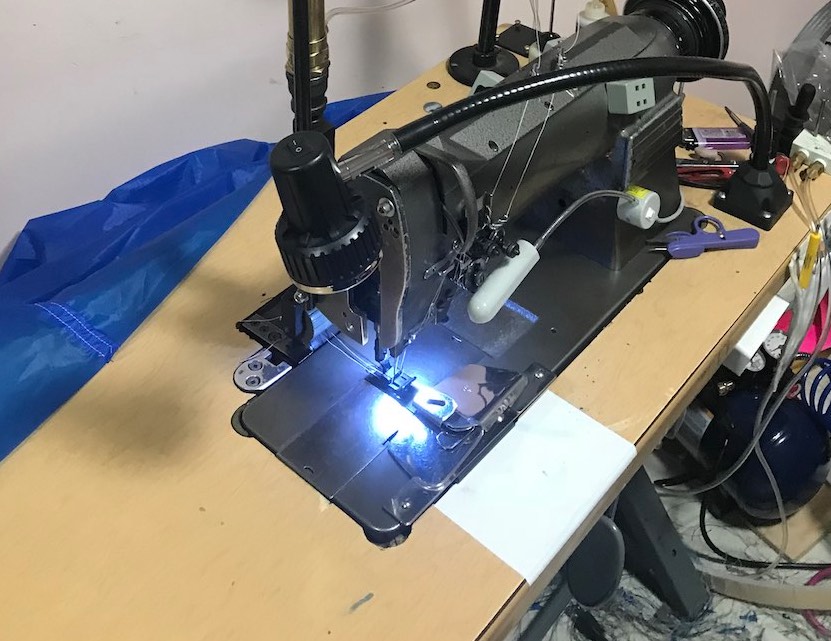
Light with white tape over it
Light showing thru fabric
Recommended Needles for these sewing machines
| Sewing Machine | Recommended Needle |
|---|---|
| Consew 333RB | 135X17 (DPX17) |
| Singer 112W116 | 126X9 (3305) |
| Singer 212W140 | 135X7 (1901) |
Recommended Thread
| Use | Thread |
|---|---|
| Balloon Fabric | Polyester #69 Bonded |
| Canvas or other thicker items | Polyester #92 Bonded |
I buy my thread and needles from
www.thethreadexchange.com
"For once you have tasted flight you will walk the earth with your eyes turned skywards,
for there you have been and there you will long to return."
- Leonardo da Vinci
"It is possible to fly without motors, but not without knowledge and skill."
- Wilbur Wright
"Ballooning is a philosophy of life. You're a prisoner of the wind. You can swear, shout, pray, cry - and it doesn't matter.
But if you change your altitude, you can go a different direction"
- Bertrand Piccard
"Life is not measured by the number of breaths we take, but by the number of moments that take our breath away."
- Will Smith
"A jack of all trades is a master of none,
but oftentimes better than a master of one."
-William Shakespeare
"Time is the most valuable gift you can give someone"
- Unknown
WWW.SKYCHARIOT.COM Home & Schedule
Keith Sproul's Festival History
Scorch the Dragon Hot Air Balloon
Pandy Hot Air Balloon
Tetrahedron Hot Air Balloon
Birthday Cake Hot Air Balloon
Pig Headed Hot Air Balloon
Fred B Rabbit Hot Air Balloon
Meteor Crater Flight
Letchworth State Park, NY Gorge Flights
Shooting the Delaware Water Gap PA/NJ
Palo Duro Canyon State Park, Amarillo, TX
Red Rock Balloon Festival, Gallup, NM
2007 Switzerland Balloon Festival
Dawn Patrol Flights
Splash-N-Dash Flights
Fried Photogrpaher Pictures
Chariot Balloons
Keith's Cameron Duo Chaiot
Balloon Flights in 3D
Keith's Balloons on Tattoos
Aerostar Aurora Balloons
Aerostar S40A (31K) Balloons
Aerostar S50A (40K) Balloons
Aerostar S55A (77K) Balloons
Aerostar S57A (90K) Balloons
Aerostar S60A (105K) Balloons
Aerostar S66A (141K) Balloons
Aerostar S71A (180K) Balloons
Aerostar S77A (211K) Balloons
Aerostar S81A (245K) Balloons
Aerostar RX6 (56K) Balloons
Aerostar RX7 (77K) Balloons
Aerostar RX8 (90K) Balloons
Aerostar RXS8 (105K) Balloons
Aerostar RX9 (126K) Balloons
Balloon Parachute Artwork
Balloon Pictures from the Bottom
Red, White & Blue Balloons
Arrow Design Balloons
Flame Design Balloons
Parachute Drop Pictures
List of University Balloons
FLIR Balloons Pictures (Infrared heat picture)
Flytec Instruments Info Page
Digitool Instruments Info Page
How to make a Hot Air Balloon
How to make a Tetrahedron Hot Air Balloon
How to put turning vents into a Hot Air Balloon
Envelope / Basket Retrieval Cart
Hot Air Balloon Crew Training
Twins
Bonnie, our Dog
Critters at our front door
Mark Sproul's Observatory
Mark & Keith's GAIA Star Database Project
Keith Sproul's N-Scale Trains
aviationweather.gov
www.ventusky.com
www.windy.com
usairnet.com Winds Aloft
www.blastvalve.com
1-800-WX-Brief